


Food Safety Basics for Home Kitchens
Upholding a high standard of hygiene in the kitchen is among the most important skills any home cook can have. While everyone wants to master cool knife tricks or figure out the perfect seasoning, the invisible science of food handling is what actually decides if a meal is a success or a total disaster. Food poisoning is a quiet but persistent threat, often starting with small, overlooked habits that allow bacteria to take hold. By refining how you clean, organize, and monitor your temperatures, you can make sure that your kitchen remains a safe place from which to feed the people you care about.
Getting Real About Cleaning
Many people think a clean kitchen is simply about wiping down the counters to make them look shiny, but real food safety is a bit more systematic. Your hands are the main way germs move around your workspace. Proper washing involves using warm water and soap to scrub your hands for at least 20 seconds. You want to make sure you're actually scrubbing under your fingernails and between your fingers, too. Repeat this process every time you switch tasks, like moving from prepping raw chicken to dicing onions, or even after you grab your phone to double-check a recipe step.
Your surfaces and tools need that same kind of discipline. Bacteria love to hide in the scratches of old cutting boards or the damp fibers of a kitchen sponge. Using hot, soapy water to scrub every tool that comes into contact with your food is non-negotiable.
One huge mistake people make is trying to rinse off raw meat in the sink, thinking that they can rinse away germs. This actually makes things worse because the splashing water can carry invisible bacteria up to three feet away from the sink, landing on your faucet, your clean dishes, or nearby hand towels. It's much safer to trust the heat of your pan to kill the germs than to try to wash them away.
The Logic of Keeping Things Separate
Cross-contamination is a sneaky threat that can catch even experienced cooks. It happens when the juices from raw proteins end up on foods that won't be cooked, like your salad greens or a fresh loaf of bread. The best way to handle this is to keep things physically separate. A pro tip is to have specific cutting boards for different tasks. Consider using a plastic one for raw meats and a wooden one for produce, so there's zero chance of a mix-up when you're in the middle of dinner prep.
This same logic applies to your fridge. You should organize your shelves based on the temperature a food needs to be heated to to be safe to eat. Raw items that need to be cooked to high temperatures, such as chicken, should always be stored on the very bottom shelf. This way, if a package leaks, it won't drip onto anything else. Meanwhile, ready-to-eat snacks and leftovers should stay on the top shelves. Even when you're at the store, keeping raw meat separate is a good idea: Put it in its own plastic bag so that if the package leaks, it doesn't ruin your vegetables before you even get home.
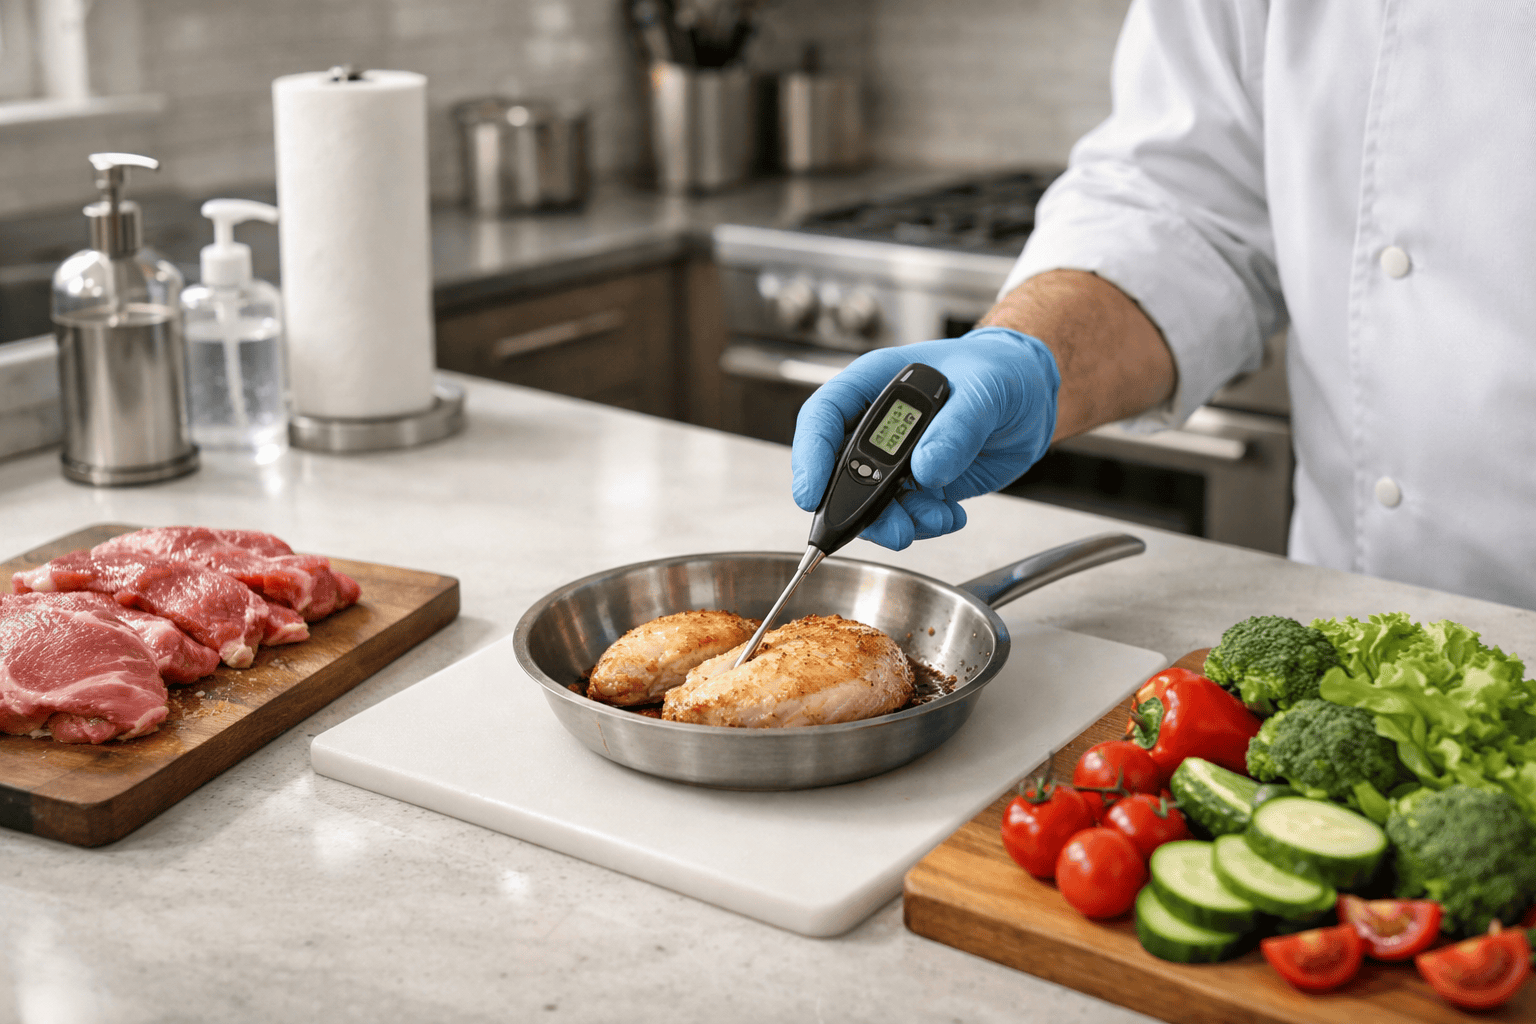
Why You Need a Thermometer
If you're still trying to tell if a burger is done by looking at the color or checking if the juices from a chicken breast run clear, you're taking a big risk. Those visual cues are actually pretty unreliable. Both professional results and basic safety depend on internal temperatures. Every home cook should own a digital food thermometer. It completely takes the guesswork out of the process and stops you from either serving dangerously undercooked meat or overcooking your steak until it's as dry as a desert.
Different meats have their own "kill zones" for bacteria. Poultry needs to hit an internal temperature of 165°F to be safe. Ground meats need to reach 160°F. For whole cuts of beef or pork, you're looking for 145°F, but you should then let it rest for 3 minutes. That rest time isn't just to keep the meat juicy; it lets the temperature stay steady long enough to finish off any remaining pathogens without making the meat tough.
Watching the Clock and the Temperature
Bacteria are opportunists. They multiply incredibly fast when food sits in the "danger zone" between 40°F and 140°F. If your kitchen is warm, a dish left out on the counter can become a problem in a very short amount of time. The golden rule is to never let perishables sit out for more than 2 hours. If it's a hot summer day, that time drops to just 1 hour. And to minimize the amount of time that cooked food spends in the danger zone, it's a great habit to move leftovers into shallow containers, which cool down faster, and get them into the fridge quickly.
Thawing food is another area where many people take shortcuts that aren't worth it. Leaving a frozen tray of chicken on the counter to thaw at room temperature allows the outside of the meat to enter the danger zone while the center remains frozen. The smartest move is to thaw things slowly in the fridge. It takes some planning ahead, but it keeps the food at a safe, constant temperature. If you're in a rush, you can use cold running water or the microwave to thaw your food, but you must cook it immediately to prevent bacterial growth.
Organizing the Pantry and Dry Goods
While food safety often focuses on the fridge and the stove, your pantry needs its own set of safety rules to keep things fresh. Dry goods like flour, rice, and spices may seem indestructible, but they can still spoil if not stored properly. The primary enemies here are moisture, heat, and uninvited guests, such as pantry moths or weevils. To keep everything in top shape, aim for a cool, dark, dry environment. Storing your oils or grains right above the stove might be convenient, but the constant heat from cooking will actually make them spoil or go rancid much faster.
A great habit to start is the "first in, first out" (FIFO) method. When you return from the grocery store, move your older cans and boxes to the front of your shelves and place the new items in the back. This will help you to use up items before they expire. It's also a smart move to transfer things like cereal, pasta, and flour into airtight glass or plastic containers once you open the original packaging. Not only does this keep the food from getting stale for longer, but it also creates a solid barrier that keeps pests out. If you ever notice a weird smell or see small clumps in your flour, though, it's best to play it safe and toss it.
Making Safety a Habit
As you become more comfortable with cooking more challenging recipes, these safety steps should become an integral part of your routine. When you know your counters are clean, your ingredients are separated, and your temperatures are locked in, you can actually focus on the fun, creative side of cooking. A safe kitchen is a successful kitchen, and these basic habits are what separate a great cook from someone who's just getting lucky.
Additional Food Safety Resources
- The Four Steps to Food Safety
- Preventing Food Poisoning
- Guidelines for Safe Food Handling
- Food Safety for Consumers
- Four Core Principles of Food Safety
- Cooking Appliances
- Preventing Foodborne Illness
- Five Keys to Safer Food
- Barbecue Grills
- Guide to Food Safety in the Kitchen
- Food Storage Safety Tips for the Cupboard
- Food Poisoning Treatment and Prevention